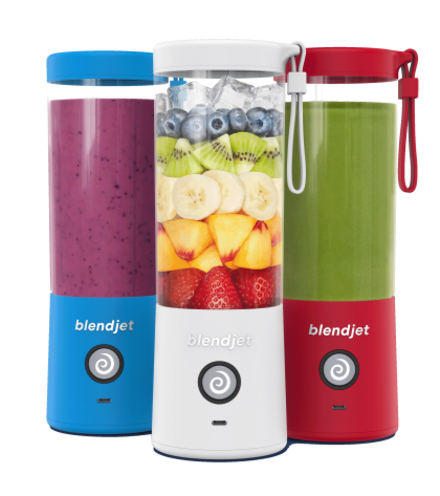
BlendJet 2 User Guide
Congrats! You’re about to embark on an amazing journey with your BlendJet 2. Here you’ll find everything you need to know to get the most out of your blender.
Make whatever you crave, wherever you are. Here’s how:
Charge your BlendJet with the included USB cable for about 1 hour or until the light ring shows a solid blue circle.
Ensure the arrows on the rear of the jar and base are closely aligned.
Clean your BlendJet prior to first use: add water, a drop of soap, blend and rinse. (Deep clean as needed - see "Cleaning" section for details.)
Add liquid first, then throw in your solids. Leave a little room at the top.
Tighten the lid and press the power button to blend for one 20-second cycle. Repeat as needed for thicker blends.
Enjoy your blended creation and clean immediately after each use.
Using the included USB-C cable, you can charge your BlendJet with most USB ports, from your phone charger, to your computer, to the USB port in your car.
Your BlendJet takes about 1.5 hours to fully charge, and lasts for 15+ blends.
The light ring around the power button indicates battery level while charging. As your BlendJet charges, the lights will change from purple to blue. When the light around the power button forms a complete blue circle, your BlendJet is fully charged.
The circle turns purple (instead of blue) while blending or pulsing whenever the battery is getting low.
The circle will flash red and purple when the battery is dead and it's time to recharge. Do not charge your BlendJet when it's wet.
BlendJet 2 has three easy-to-use modes: Blend Mode, Pulse Mode and Lock Mode.
Perfect for smoothies, shakes and mixed drinks.
WHAT IT DOES:
Allows you to achieve a totally smooth consistency.
HOW IT WORKS:
Press power button once to start a 20-second blend cycle, or press it again to stop mid-cycle.
Perfect for guacamole, salsa and hummus.
WHAT IT DOES:
Allows you to achieve a chunkier texture.
HOW IT WORKS:
To enter Pulse Mode, double-press the power button. Blue lights will flash left to right 3 times and the swirl will stay illuminated while Pulse Mode is active. Press and hold the power button repeatedly to pulse. Pulse Mode will automatically end after 5 seconds of inactivity.
Pro Tip: Pulse Mode is amazing for powering through extra tough ingredients.
Perfect for sipping and travel.
WHAT IT DOES:
Allows you to drink straight from your BlendJet, or toss it in your bag, without worrying about it turning on by mistake.
HOW IT WORKS:
To lock, you must be in Blend Mode. Make sure the lid is secured, then hold down the power button for 3 seconds while purple lights illuminate clockwise to form a complete circle. The purple circle will flash 3 times to indicate Lock Mode is active.
To unlock, hold down the power button for three seconds until the purple lights disappear. A blue circle will flash 3 times indicating your BlendJet is unlocked and ready to blend again.
Jar isn’t aligned with base.
Loosen the jar from the base and screw it back in until the arrows on the back of the jar and base line up. The arrows are meant to be a guide, but they might not line up perfectly, and that's okay. The best way to tell when the jar is properly aligned will be looking at the power button the front - when it flashes white instead of red, that means you're good to go!
Blades are blocked.
Flip your BlendJet upside down and give it a shake to loosen the jam. Start blending upside down, then turn it right-side up again so your ingredients hit the blades at full speed.
Pro Tip: Pulse Mode is also amazing for powering through jams and extra tough ingredients!
Always clean your BlendJet immediately after each use to prevent food from drying and sticking to the blades. Your BlendJet 2 is water-resistant, so it’s okay if the USB port gets wet, but never put your BlendJet—including the base, jar and lid—in the dishwasher, or submerge it entirely under water. Gently pat the BlendJet logo to dry, or simply let air dry.
Fill the jar about 2/3 full with warm (not hot) water, add a drop of dish soap and blend for one full cycle until your BlendJet automatically stops. Pour out liquid and rinse with clean water.
Remove the jar from the base: twist the jar counterclockwise while twisting the base in the opposite direction.
Using a fork, carefully remove the silicone gaskets from the lid and base for a more thorough clean. Take note of which gasket goes where, as the two are slightly different. The one with the groove goes in the base.
Wash the jar, lid and gaskets in soapy water.
Use a dish brush to dislodge any debris around the blades, if needed. Never put your hands in the path of the blades.
Each part should be left out long enough to fully air dry.
To reassemble your BlendJet, place the grooved gasket back in the base. Make sure the grooved side is facing down. Use the tip of a spoon, if needed, to press it firmly into place. This will help to prevent leaking. Next, place the jar on top and screw it into the base to push in the gasket fully.
Place the second gasket back in the lid, pushing it it into place with either your fingers or a spoon.
Please review these precautions carefully before using your BlendJet for the first time.
DO store your BlendJet in a secure place, out of the reach of children.
DO operate your BlendJet with the lid securely screwed on.
DO use only high-quality USB chargers (like the one that came with your phone) and the included USB-C cable or certified USB-C cables.
DO firmly push the USB cable all the way in to charge (do not plug it in partially).
DO allow ingredients to settle in your BlendJet before you unscrew the lid after blending.
DO take care when handling the base of the blender without the jar attached. As a safety precaution, there are magnets in the jar and base of the blender that must be aligned for BlendJet to work. Magnetic objects can fool the base into thinking that the jar is attached and allow the blades to spin.
DO NOT charge your BlendJet when it's wet. Use only high-quality USB chargers (like the one that came with your phone) and the included USB-C cable or certified USB-C cables.
DO NOT let children use BlendJet unattended. Adult supervision is necessary at all times. Store in a safe place outside of the reach of children.
DO NOT put your hands inside your BlendJet or anywhere near the blades. The blades can still spin when the lid is off.
DO NOT put your BlendJet in the dishwasher. Your BlendJet is water-resistant, so it's okay if the USB port gets wet, but NEVER charge when wet, and NEVER submerge it underwater.
DO NOT put your BlendJet in a microwave oven or freezer.
DO NOT use hot liquids over 120°F / 49°C. This can cause damage to the jar and base, including leaks.
DO NOT put anything carbonated in your BlendJet. This may cause pressure to build up in the jar & can result in a mess, possible injury, or damage to the blender (immediately or over time).
DO NOT put MCT oil (or powder) in your BlendJet; over time, this can damage the blender.
DO NOT let food sit in your BlendJet for prolonged periods. This may lead to fermentation and build pressure in the jar to the point where it bursts, resulting in a mess, damage or possible injury.
DO NOT run your BlendJet while it’s empty as this can damage the blender.
DO NOT immerse the charging cable in water or other liquids to avoid risk of electric shock.
DO NOT allow the charging cable to touch hot surfaces.